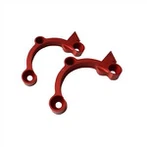
Stage 1: Create a 2D or 3D CAD Model
The first step of the CNC milling process is to create 3D (or 2D) drawings of your desired part using CAD/CAM software like Autodesk Inventor, Fusion 360, and SolidWorks. These computer-aided design (CAD) or computer-aided manufacturing (CAM) tools allow you to specify your dimensions and tolerance requirements.
Stage 2: Convert the CAD Model to a CNC program
Export your CAD model into a CNC-compatible file using the CAM software we mentioned in stage #1. CAM tools have functionalities that allow you to convert your 3D CAD model into a computer program called G-code.
The G-code then automates all the actions necessary to fabricate your part, for example, the cutting sequence, toolpath, machine tool speed, workpiece movement, to name a few.
Stage 3: Setup the CNC Milling Machine and Execute Milling Operation
This is the phase where you insert your workpiece into the CNC machine work surface, attach your cutting tools into the spindle of the CNC machine, and download the G-code you already created in stage #2.
Once all these steps have been completed, proceed to initiate the machining program. And the milling machine will perform all operations needed to turn your workpiece into your desired part.